Welcome to a step-by-step guide of how to approve or decline bidder registrations.
Snoofa has a very advanced bidder registration process. Most of this process is done by the clients themselves, as they go through the verification steps in the client zone. However, there is one piece of the puzzle that requires some input from administrators. They will need to manually check the documents that bidders have uploaded.
But there is some good news: it is very straightforward to manage this in Snoofa.
Here is a breakdown of the steps taken to check the identification. Alternatively, you can watch a video to see how this works.
Read this article to find out how to configure your compliance settings.
Instructions
It is very clear from the dashboard when there are new documents to approve, as there will be a number bubble on the Clients tab on the main menu. Staff members can be added to the compliance notification settings so they are signed up to receive a notification when there is a new client to approve. See how to do that here. |  |
Having seen that there are some clients pending approval, we’ve now moved onto the clients datagrid. Now we need to filter out these clients whose IDs we need to check. To do this, within the Advanced Certification filter, choose the ID to Check option and click Filter. Now you should only see the pending clients. |  |
The relevant clients will have the ADVANCED: ID to Check |  |
Once you’ve selected a client to review, click on the Compliance tab of the client menu. It will show a warning icon when there is action to undertake. |  |
If the ID that has been uploaded has already expired, the system will show this. | 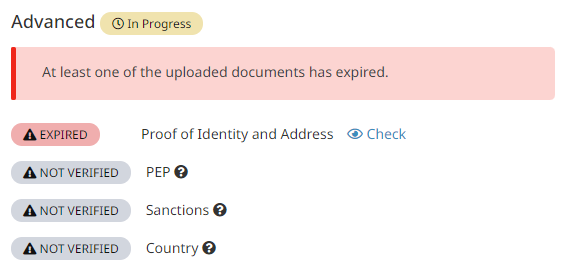 |
Sometimes the Proof of Identity and Address shows a yellow label saying Incomplete. This means that the client has opened the component to upload their ID, but has not completed the process of sending the IDs. Perhaps they have clicked away and closed the screen. In this scenario they need to re-open the add ID component and complete the process. |  |
To check the ID documents, click on the Check button in the Advanced section. |  |
Click on the images to view the documents. |  |
By clicking Download Full Report, you can access the full report from the document scan provider to see which elements of the document have been checked by the technology. | 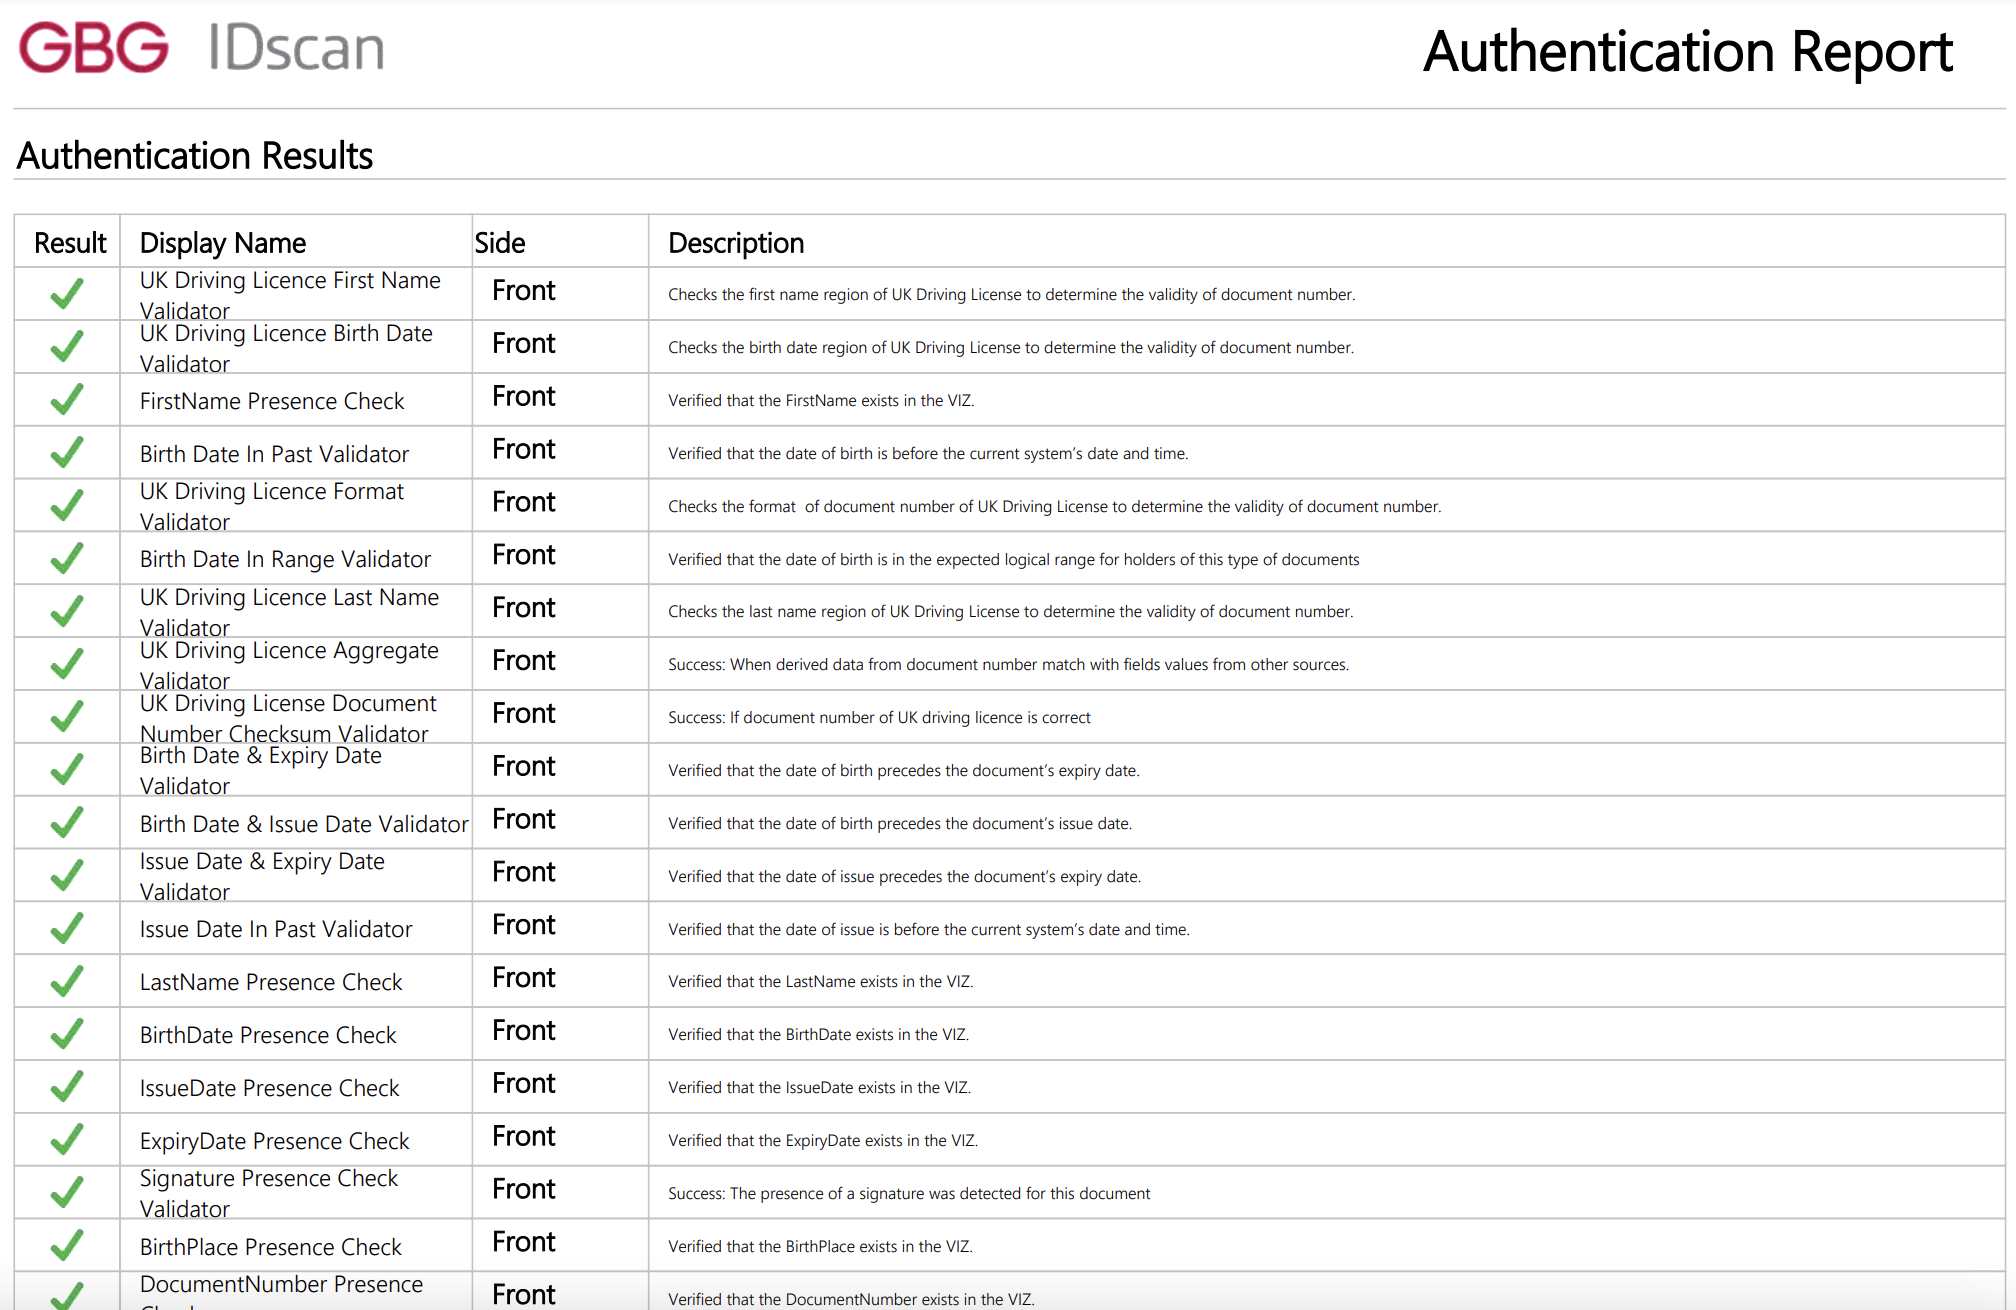 |
Click Decline to reject the documents. You will be invited to provide a reason for declining the documents. Any text entered here will appear in the email the client receives when they are notified the documents have been declined. It will also appear in the client zone. | |
The client will then show as Declined.
|  |
Alternatively, to approve the documents, click Accept & Continue. |  |
Now that you have approved the client, there will be some final checks which will run automatically:
If any of these checks fail, then Enhanced Due Diligence on the client should be performed outside of Snoofa. You can then choose to accept the client or decline permanently. Example: A client shows up as a PEP. However, you still choose to certify the client because they appeared on the list as they are well-known publicly, not because they are unscrupulous. | 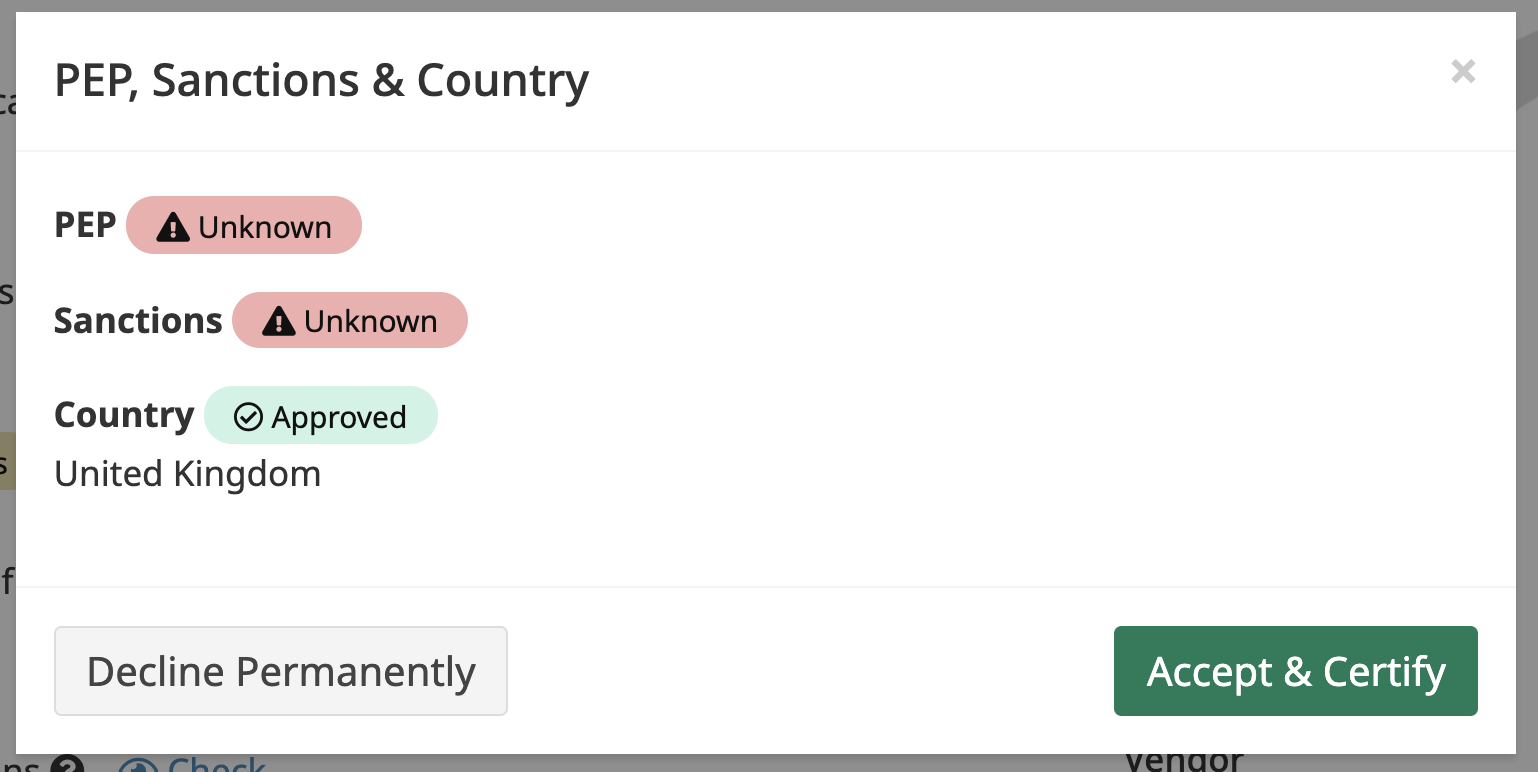 |
Once accepted, the client will then have the Advanced level of certification and is approved to exceed the Linked Transaction Sum. |  |
These clients can easily be found by selecting Approved on the Advanced Certification filter on the clients datagrid. |  |
The dashboard of a client who has passed all of the checks will look like this, however it is possible to have a client who has achieved advanced certification who has not passed all checks. | 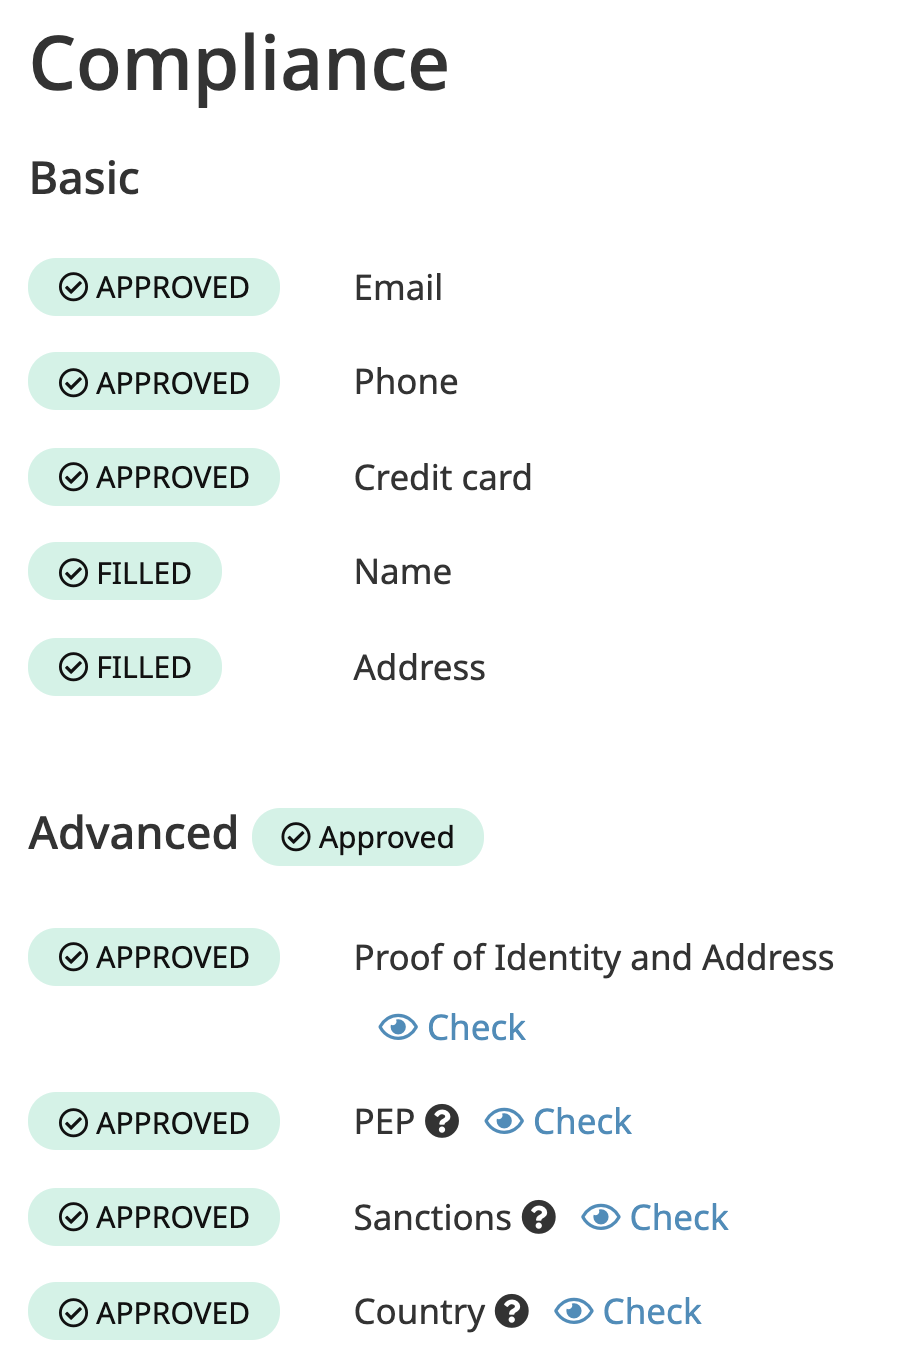 |
If at any point the client needs to be suspended, this can be done from the Actions dropdown. |  |
The client will now have the Suspended tag and will no longer be able to access the client zone or place bids. | 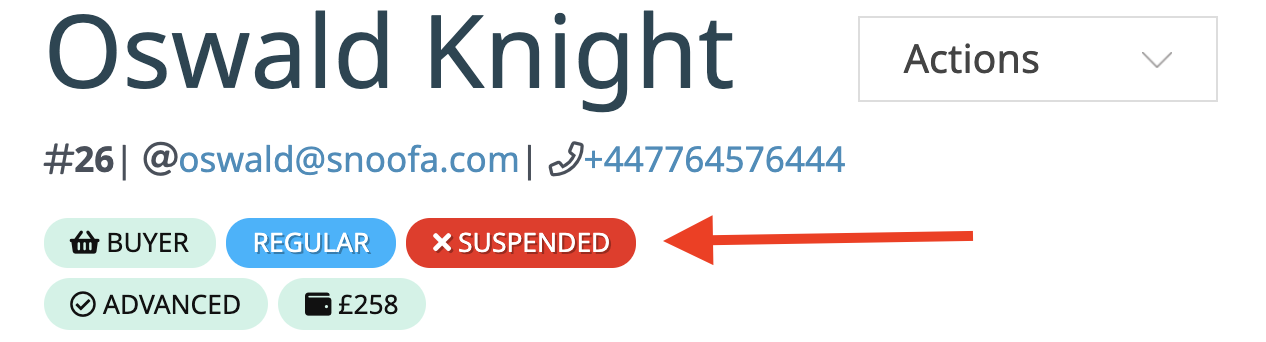 |
You can easily reactivate a suspended client, by clicking Reactivate. | 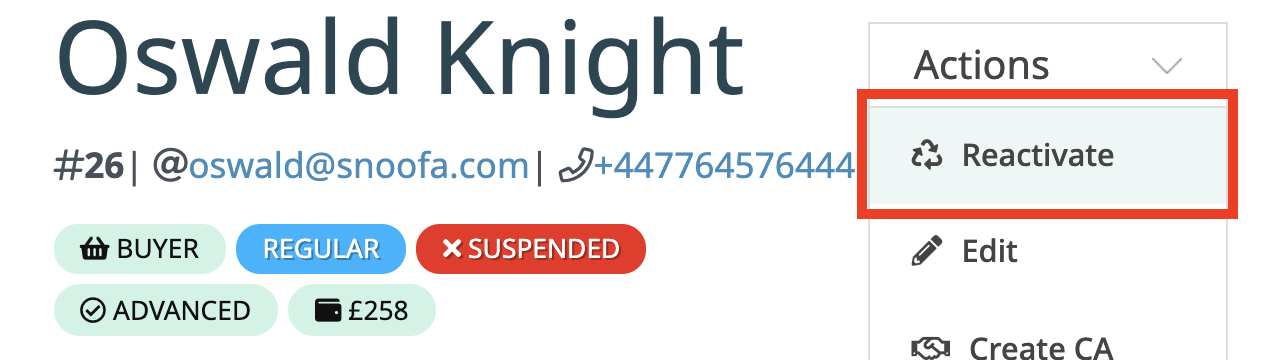 |


So there you have it, that’s how to check ID documents!
Was this article helpful?
That’s Great!
Thank you for your feedback
Sorry! We couldn't be helpful
Thank you for your feedback
Feedback sent
We appreciate your effort and will try to fix the article